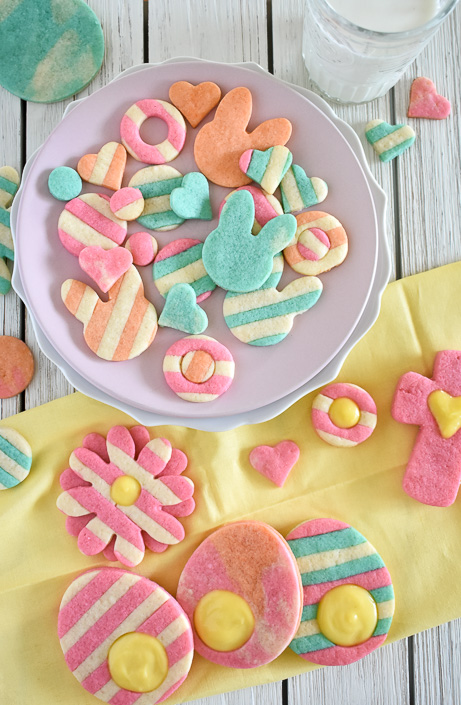
Welcome to Spring! I brought cookies. But first, some Easter thoughts. It occurred to me as I was baking these cookies that I only marginally enjoyed Easter egg hunts as a child. Being a bit on the timid and non-competitive side, they brought me a fair amount of stress. Let’s face it, they’re not for everyone.
My biggest fear…that aggressive kid who would push his way through every obstacle or child to grab as many eggs as possible. The one your mother warned you about. He dove head-first into bushes while letting out loud cries, Braveheart-style. There was also Speed Racer, with her superhuman abilities to scoop eggs and run at lightning speeds, filling her basket in record time.
Then there was me – the lone hunter. I was the one on the opposite side of the yard, strategically surveying the scene and staying away from the madness. Survival was key. The eggs didn’t matter all that much. I didn’t like jelly beans anyway. Still, I went through the motions all the while remembering there were better things to come…a bunny cake and pastel iced cookies waited inside. That was more my style.
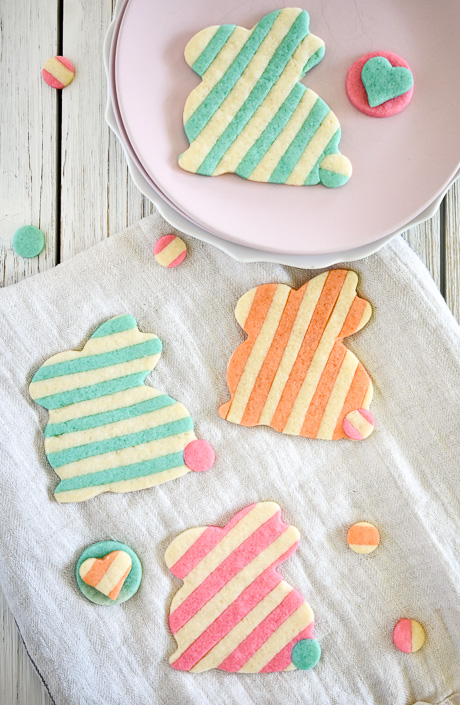
Cookies are my favorite treat to bake. From basic chocolate chip cookies (these are my all-time favorite) to pretty sugar cookies like these, I find the process of cookie-making enjoyable and relaxing. In my world, few things are better than being in my kitchen on a rainy day with my 80’s playlist and a good cookie recipe.
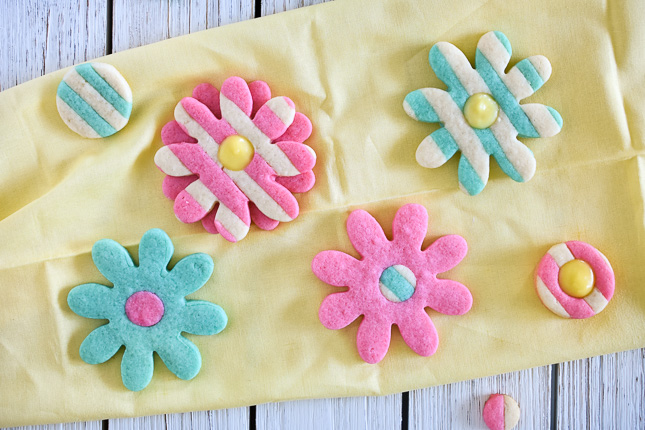
On that note, I’m very excited to show you how to make these fun, sweet treats for two reasons. First, they require no time-consuming icing decorations. If you’ve ever worked with royal icing, you know that between getting the icing consistencies just right, coloring them, and decorating in different steps to allow for icings to dry, it can be a long and tedious process. And, while I do occasionally get into that sort of cookie decorating mood, I don’t often have time for it. By coloring the cookie dough in this way, the need for icing is eliminated. While I can appreciate a beautifully decorated iced cookie, I do love the way these less fussy “naked” ones turned out.
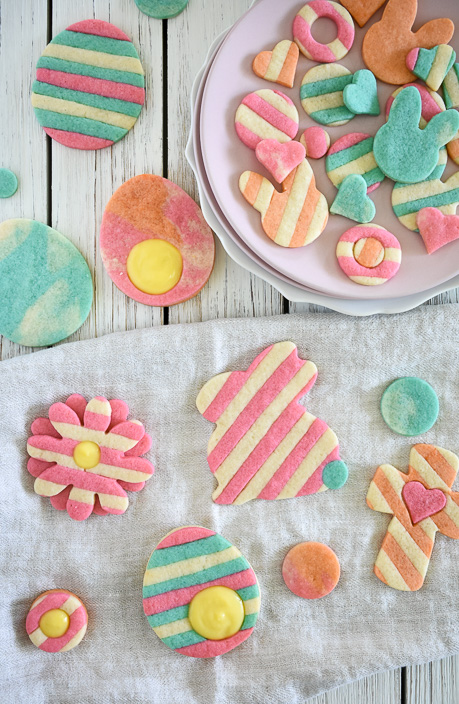
The second reason I’m excited to share these with you is because this is my favorite sugar cookie recipe. I’ve been using it for many years. I use it every time I make cut-out sugar cookies, whether they are iced or not. It’s buttery, delicious, and holds its shape during baking.
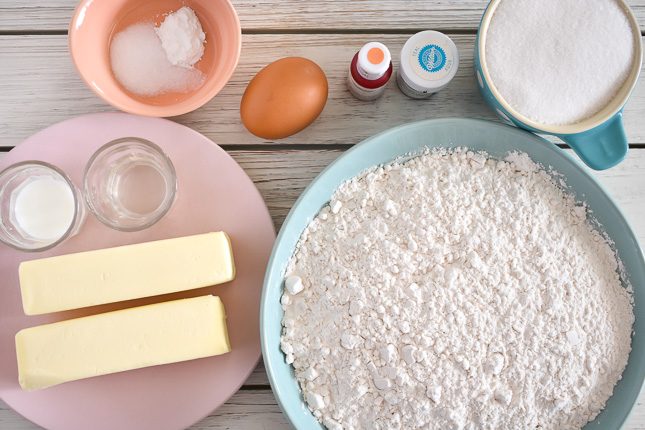
The ingredients are simple and probably already in your pantry – butter, sugar, flour, one egg, baking powder, salt, milk, vanilla & almond extracts, and gel colors of your choice.
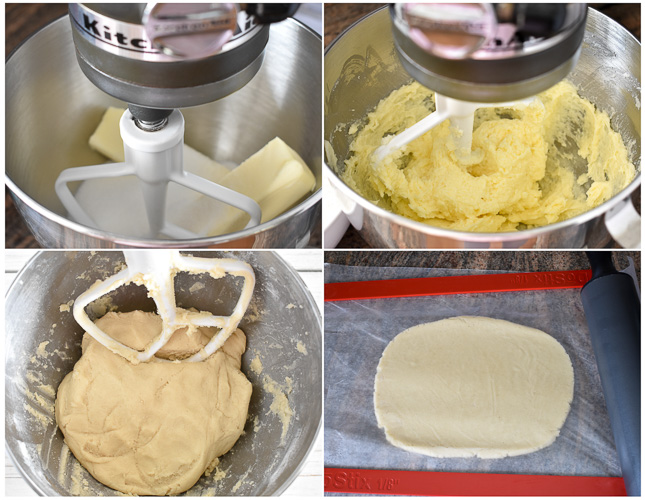
It comes together in 5 minutes and rolls out completely mess-free using layers of plastic wrap and wax paper instead of flour. Using this mess-free method changed my whole outlook on making cut-out cookies. I used to feel it was too much work and made too much of a mess. This method changed everything. Check out this post for my Chocolate Sugar Cookies to see a short video of the rolling process. It’s the same one I used for these.
Once the dough is made, the fun begins. Bring on the color! I doubled the recipe in order to create all the colors you see here. If you make the recipe as written, it would be best to stick with just 2 colors. Divide the dough into equal portions and color it using any colors you like. Liquid food coloring is not as concentrated, so I recommend using gels.
Flatten the dough into about a 1/2 inch thick rectangle and place it between a layer of plastic wrap and wax paper. Roll to desired thickness. I rolled these pretty thin (1/8 inch) since I planned on filling and sandwiching some of them together after baking. Next comes the most important part – chill your dough. It’s the best way to make sure your shapes cut out neatly and hold their shape during baking. Place your dough onto a cookie sheet and into the fridge for at least 20 minutes prior to cutting out shapes. I often make and roll out my cookie dough the day before I plan on cutting out and baking my cookies.
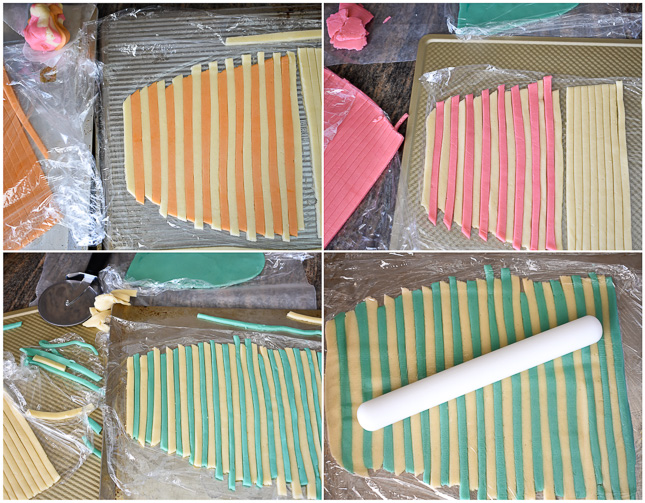
Once it’s nicely chilled, you can cut out your shapes and then bake. But, if you want to be “extra” (like me), you can cut out thin strips using your pizza wheel and then line them up in alternating colors. It creates a really fun and colorful striped look. When I first started doing this, I used my ruler to mark the dough exactly 1/4″ apart and then I realized I wasn’t going to finish before Easter, so I ditched the measuring. Once you have all the strips lined up, you will need to join the seams together by rolling over the top very lightly with your rolling pin. If your dough gets hard to work at any point, just place it into the fridge again or into the freezer for a couple of minutes.
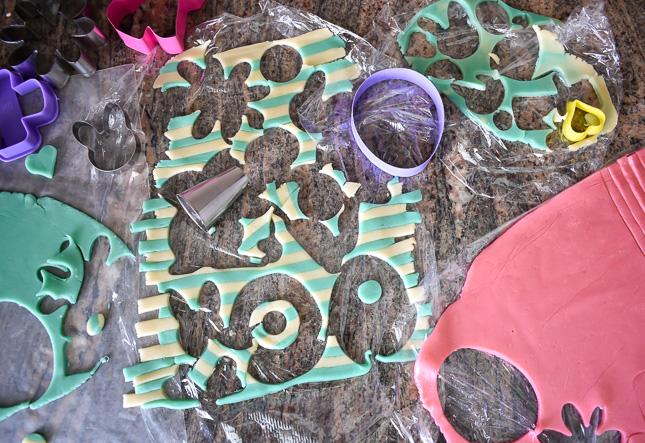
As you can see, I cut holes/circles into some of my cookies because I wanted to fill them with lemon curd and I wanted the curd to be part of the cookie decor. If you plan on doing this, make sure you cut out a match for the cookie with the hole to use as the bottom half (obviously that one shouldn’t have a hole in it). The tangy lemon curd is so delicious with the buttery vanilla cookie. I made the curd the day before and kept in the fridge until I needed it. Here’s a visual…
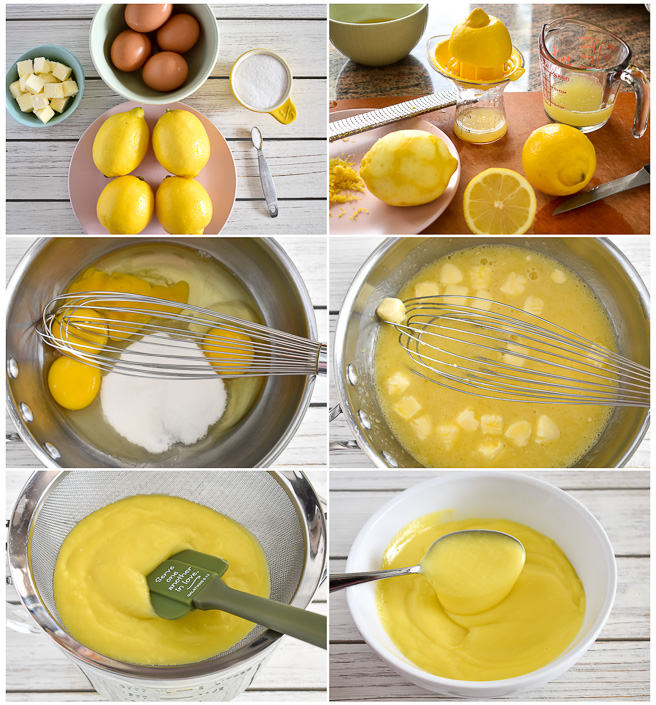
It comes together in just 10 minutes with the simple ingredients you see above. It cooks quickly and then gets strained through a fine mesh strainer. The result is very creamy, very lemony, and very good. My daughters ate the leftovers by the spoonfuls. You can also use store-bought curd or your favorite fruit jam.
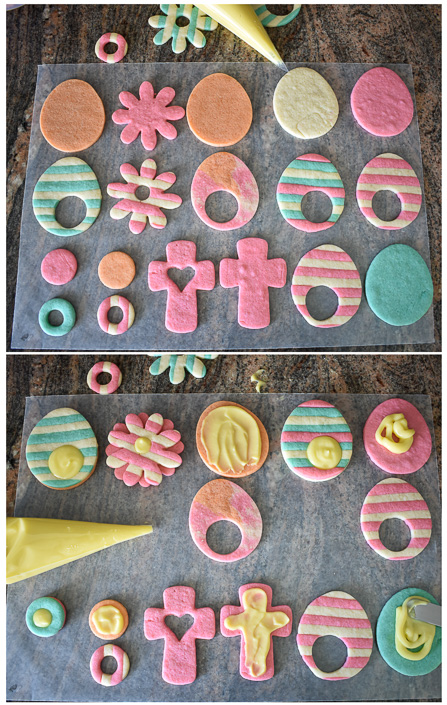
Back to the cookies. Once they baked and cooled, I placed the ones to be filled onto a piece of wax paper with their matching cookie bottoms. I spooned the cooled lemon curd into a piping bag, snipped off the tip and covered the cookie bottoms with it. Then, I placed the tops on and added more curd into the circular cut-out.

Small cookie cutters come in handy to use up as much of the striped dough as possible. If you have lots of striped scraps left, don’t discard them. If you mix up that dough a little and roll it out, you will end up with pretty marbled cookies like these.
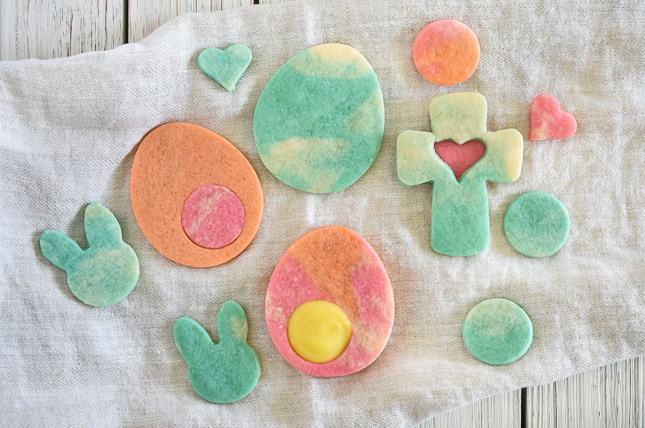
Since there’s no flour used to roll them out, there’s no need to worry about the dough drying out from all the re-rolling. Just keep using the plastic wrap and wax paper until all your dough is used up, chilling as needed in between.
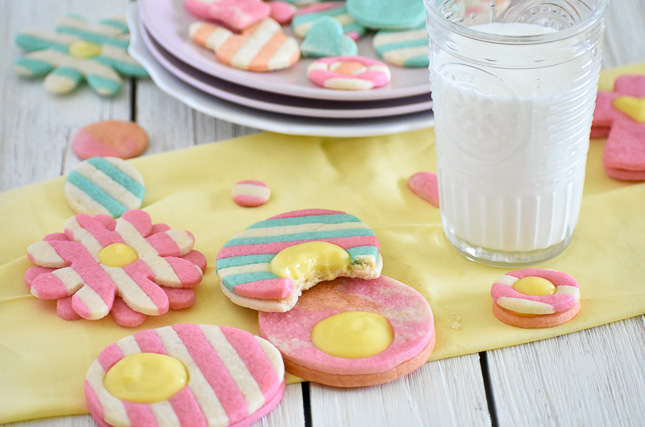
I had so much fun making these Easter cookies. I hope you give them a try! They’re happy, delicious, and guaranteed to brighten up your Easter table.
Wishing you peace and love this Easter season. God bless you.
You might also like:
Easter Carrot Cake with Vanilla Cream Cheese Frosting
Easter Sugar Cookies
These colorful Easter Sugar Cookies roll out mess-free and require no fancy icing decorations. Just happy, buttery deliciousness.
Lemon Curd
- 2 large whole eggs
- 2 egg yolks (from large eggs)
- 1/2 cup sugar
- 1/8 teaspoon salt
- 1 Tablespoon lemon zest
- 1/2 cup freshly squeezed lemon juice (you will need 3-4 lemons)
- 5 Tablespoons unsalted butter, diced into small cubes
Vanilla Sugar Cookies
- 3 cups all-purpose flour
- 1/2 teaspoon baking powder
- 1/2 teaspoon salt
- 1 cup (2 sticks) unsalted butter, slightly softened
- 1 cup sugar
- 1 large egg
- 1 Tablespoon whole milk
- 2 1/2 teaspoons vanilla extract (I used clear vanilla extract)
- 1/4 teaspoon almond extract (optional)
- gel colors of your choice
Lemon Curd
-
Place eggs, egg yolks, and sugar into a medium saucepan. Turn heat to medium and whisk well to combine. Stir in salt, lemon zest, lemon juice, and butter. Continue mixing continuously until mixture becomes creamy and thick, about 5 minutes. Be careful not to overcook.
-
Remove from heat and strain curd through fine mesh strainer, stirring and pressing the curd with a spatula to help it through.
-
Store in refrigerator for up to 5 days until ready to use.
Vanilla Sugar Cookies
-
In a large bowl, whisk together flour, baking powder, and salt. Set aside.
-
Using an electric mixer, beat butter and sugar on medium speed until light and fluffy. Add egg, milk, vanilla extract, and almond extract. Keep mixing just until well combined.
-
Decrease mixer speed to low and gradually add in flour mixture. Let the dough stand at room temperature for about 5 minutes, until slightly firmed up.
-
Divide dough in half. Add desired gel colors to dough. Flatten each piece using your hands into roughly a 1/2 thick inch rectangle. Place a long piece of plastic wrap on countertop and place dough on it. Place a piece of wax paper (about the same length as the plastic wrap) on top of dough. Using a rolling pin, roll out to 1/8 inch thick (or thicker if desired). Place rolled out dough onto a baking sheet and refrigerate for at least 30 minutes or 15 minutes in the freezer. At this point, you can leave the dough in the refrigerator overnight if you wish.
-
To make striped cookies, remove wax paper and cut thin strips of dough in different colors (between 1/8 inch to 1/4 inch wide) using pizza cutter or small sharp knife. Place strips directly next to each other in alternating colors. If dough becomes warm and hard to handle, place back in freezer for a few minutes. Place wax paper over striped dough pattern and roll top very lightly with rolling pin just to make colors join slightly. Refrigerate dough again for at least 15 minutes before cutting out with cookie cutters.
-
Line a baking sheet with parchment paper and preheat oven to 375 degrees. Cut out shapes from chilled dough. If filling cookies with lemon curd later, remember to cut two identical shapes for each filled cookie to use as cookie top and bottom. Bake for 8-11 minutes, rotating baking sheet halfway through to ensure even baking. Transfer baking sheet to wire rack and let stand until cookies firm up slightly, about 5 minutes. Remove cookies from baking sheet and allow to continue cooling to room temperature on wire racks.
-
Fill cookies with lemon curd, if desired.
Store baked cookies at room temperature in an airtight container for up to one week.
Store leftover unbaked cookie dough by shaping into a disk and wrapping well with plastic wrap and placing into a plastic freezer bag. Dough may be frozen for up to 2 months.
Sugar Cookie recipe adapted (slightly modified) from The All-American Cookie Book
Lemon Curd recipe adapted (slightly modified) from Molly O’Neill
Adorable! Gotta make these with my daughter. Happy Easter!
Thank you Coco! They’re really fun to make. Happy Baking & Happy Easter 🙂