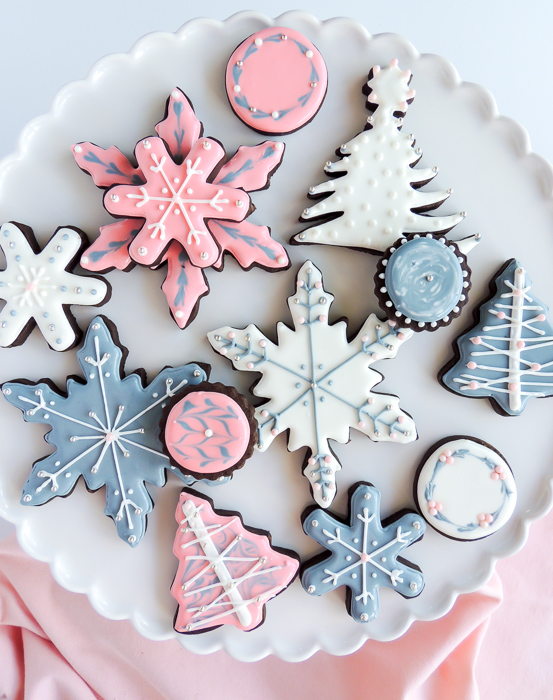
Before I get to these pretty little Chocolate Sugar Cookies, let’s talk Christmas memories. Do you have any funny holiday mishap stories? I have several, but one stands out more than all the others. It involves my husband, a Christmas tree gadget, and a puddle of ruined presents.
Here’s the way it went down. My husband proudly came home one December several years ago with a contraption to save him all the time it takes to bend down and add water to the base of the Christmas tree. It consisted of a 3 foot long straw made of hard plastic with a funnel-looking thing on the top end (here’s a visual). It was meant to always stay up against the tree’s trunk with the straw end draining into the Christmas tree stand.
The beauty in this amazing tool (according to my husband) was that you didn’t have to fight all the prickly branches and the unnecessary energy spent watering the tree at its base. You would just add water to the funnel while comfortably standing next to the tree. It would drain from the funnel down through its thin plastic straw into the tree stand. My husband boasted with pride every time he used it. Genius right? Sure…unless you fail to check the water level inside the tree stand now and then (do you see where this is going).
It’s important to note that at this point, there were already quite a few gifts under our tree as it was 3 or 4 days before Christmas. As I was placing more gifts under the tree one day, I noticed water all over the floor around the tree and soaking up through the tree skirt. And then it hit me. My husband with his awesome contraption had flooded Christmas. Every gift under the tree was inundated. My jaw dropped. Every beautifully wrapped gift completely drenched. I specifically remember a nice coffee table book I had bought a friend – every page a soggy mess. I remember peeling the wrapping paper off the gifts in tiny pieces.

I was pretty upset at my husband and for a moment, had vivid images about how I would get my revenge. Instead, I just interrogated him sarcastically. “Did you think the water you were adding was draining into the ocean?” I justified the sarcasm since I had spent weeks thoughtfully picking out, buying, and wrapping each gift. Eventually, I was able to find the humor in it and now, years later, it’s a running joke…”remember the time you watered all our Christmas gifts?” So, here are the lessons I learned that day:
- Christmas tree skirts are not very absorbent
- Christmas trees are not always as thirsty as you think
- Things are usually not as bad as they seem
- Cookies make everything better
I baked and decorated lots of cookies following that incident. It’s a stress reliever for me. I really enjoy decorating cookies when I have the time. I’m not going to lie. It is time intensive. But, you certainly don’t have to decorate them this way or even at all. These Chocolate Sugar Cookies are delicious without icing too. A simpler idea is just to outline them or add small details with royal icing or any icing if you would rather not bother with royal icing.
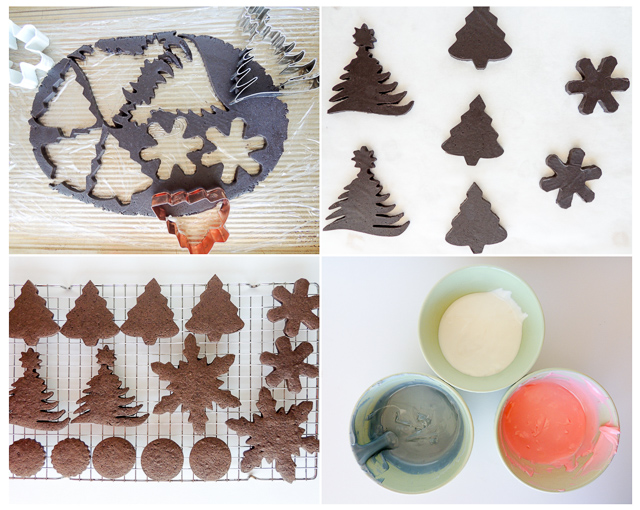
The cookie ingredients are very basic pantry staples – flour, butter, sugar, cocoa powder, etc. I used dark cocoa and added a bit of coffee, which I think really adds to the flavor. If you do want to make the royal icing as I have done, you will need meringue powder. You can buy it in the baking section of most craft stores or online. The recipe I used for the icing is adapted from Sweet Sugarbelle. It’s easy, once you get the hang of the different icing consistencies you need for both outlining and flooding the cookies.
I think a lot of people are put off by the flour mess involved in rolling sugar cookies. If you are one of those, fear not. I have been using this mess-free way of making sugar cookies for many years and it’s the only way I like making them. Other ways are stressful, messy, and involve lots of clean-up and frustration. With this method, you will keep things neat and your cookies will hold their shape while baking, so your reindeer will look like reindeer and not like hippos after baking.
I made a short video of the rolling process (sorry for the poor quality), but basically after making the dough, you divide it in half. Working with one half at a time, you lay a long, rectangular piece of plastic wrap on your counter and place the dough on it. Press it down to flatten it a bit. Then, add a layer of wax paper on top and you’re ready to roll. There is no need to flour anything, which is great because the cookies won’t absorb extra flour and get tough and it will keep things tidy.
I used DoStix (one of my favorite baking tools) to get an even dough throughout. I highly recommend these if you enjoy making these type of cookies. It’s hard to get your dough an even thickness without something like this. I used to use wooden dowels, but they would roll around. These are much easier. There are three different sizes in the set. I usually use the 1/4″ thick ones.
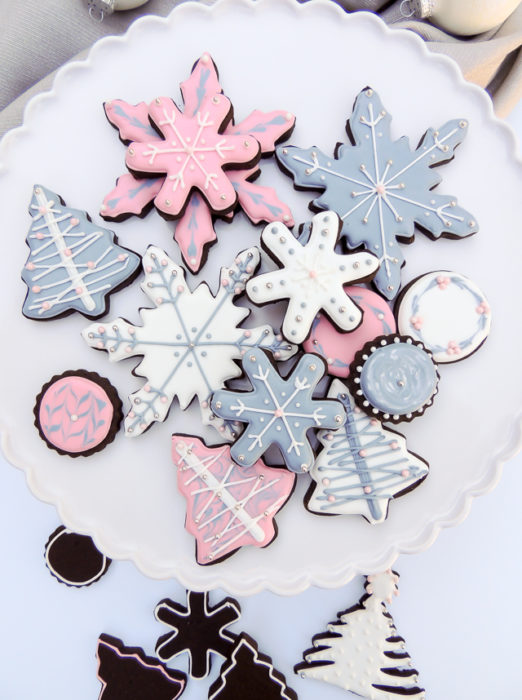
Once your dough is all rolled out, you will need to chill it in the fridge for about an hour or for about 15-20 minutes in the freezer. It will be much easier to cut shapes out of chilled, firm dough. Once you have them all cut out, place them back in the fridge for 5-10 minutes to firm up again. This helps keep them from spreading and losing their shape.
Chocolate cookies (or other dark-colored cookies) are a bit tricky to bake because you can’t see when they are beginning to turn light golden around the edges. The reason that most cookie recipes have a range in baking time is because you have to consider two things: the color of your pan and the size of your cookie. If using a dark gray/black pan, bake them closer to the lower end of the time indicated and if using a lighter baking sheet, bake them closer to the high end of the time indicated. Also, try to bake similarly-sized cookies together to avoid a tray of half burnt/half underdone cookies. Smaller ones will cook much faster.
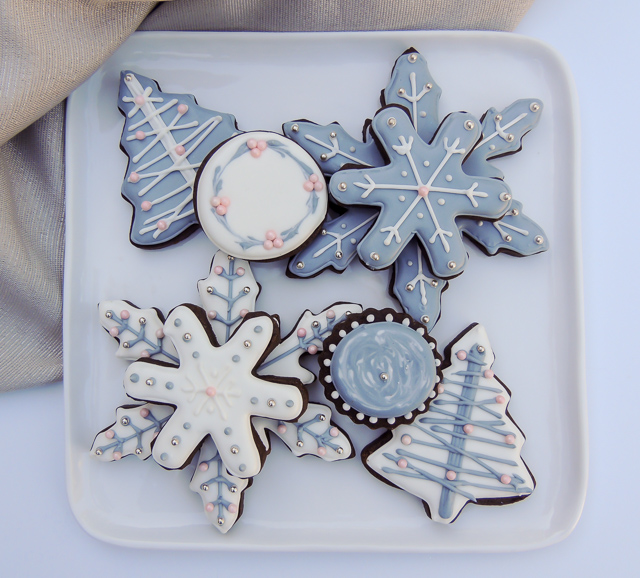
Once your cookies are baked, allow them to cool completely before decorating. I often bake them all one day and decorate the following day. In terms of decorating, I won’t go into too much detail since everyone likes to do their own thing. But, I will tell you what I use: 12″ disposable decorating/piping bags fitted with size 1 or size 2 tips for outlining and adding details, a squeeze bottle for flooding the inside of the cookie, toothpicks, and a wet cloth to frequently clean my piping bag tip. See the notes in the recipe below for tips regarding icing consistency. If there is a lot of interest in watching the whole cookie decorating process, leave comments and I will develop a post with videos specifically for that.
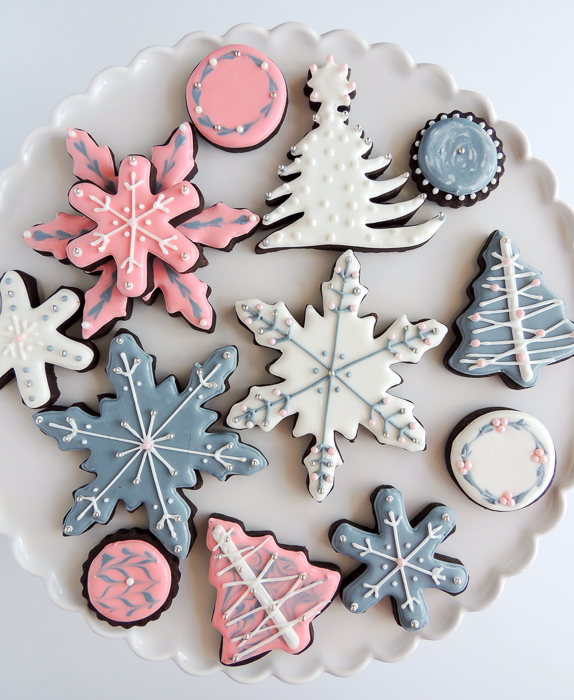
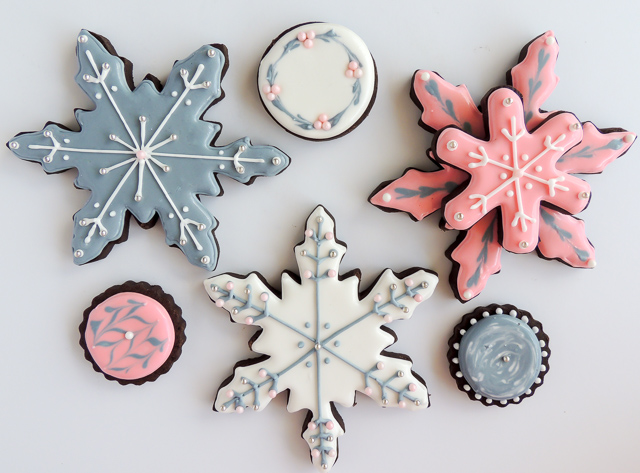
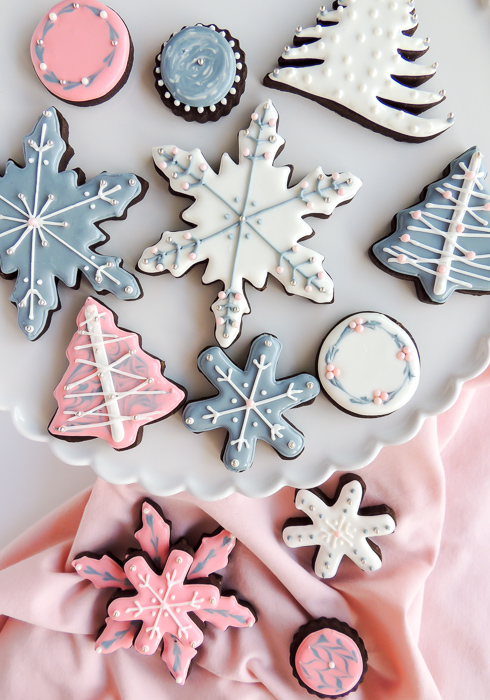
Decorating cookies like this is lots of fun, but it helps to be organized and to have an idea of what you want to achieve. With these, I knew I wanted mostly holiday shapes, 3 colors, and edible pearls in coordinating colors. I looked online for inspiration, but mostly just did my own thing. Have fun with it. If you mess up, eat it. My kids complain that they always get the mistakes…the ugly cookies. But, hey, they still taste good.
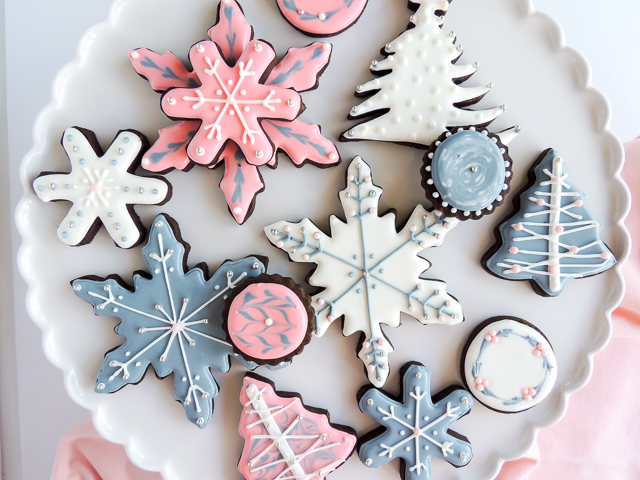
After reading this, I hope you feel excited and motivated to tackle this mess-free, simple method of making sugar cookies. You can use this method with vanilla or gingerbread sugar cookies too. I hope your holidays are filled with the love of family and friends, many delicious sweet treats, and all the things that bring you peace and joy.
Other holiday cookies you might like:
Chocolate & Strawberry Jam Thumbprint Cookies
Pistachio White Chocolate Chip Cookies
Chocolate Sugar Cookies
Delicious chocolate sugar cookies that roll out mess-free and hold their shape during baking.
- 3 cups all-purpose flour
- 1/2 cup unsweetened cocoa powder (I use dark cocoa powder)
- 1/2 teaspoon salt
- 1/2 teaspoon baking powder
- 1 cup (2 sticks) unsalted butter, room temperature
- 1 cup sugar
- 1 large egg
- 1 1/2 Tablespoon whole or 2% milk
- 1 teaspoon instant coffee (dissolved in 2 Tablespoons hot water. You will use the full 2 Tablespoons in the recipe) (You can use 2 Tablespoons strongly brewed coffee instead)
- 1 teaspoon vanilla extract
Royal Icing
- 2 pounds powdered sugar
- 5 Tablespoons meringue powder
- 3 teaspoons extract of your choice (I used vanilla & almond) (Must be oil-free)
- 1/2-3/4 cups warm water (You may need slightly more)
-
In a large bowl, whisk together flour, cocoa, salt, and baking powder. Set aside.
-
Using a mixer, beat butter and sugar at medium speed until light and fluffy. Add egg, milk, coffee, and vanilla. Mix just until blended.
-
With mixer on low, add flour mixture gradually until well incorporated. Scrape bottom and sides of bowl with a spatula and hand mix until no more flour is visible.
-
Divide dough into two equal parts. Leave one in the mixing bowl. Place the other on a long, rectangular piece of plastic wrap and press it down to flatten a bit with your hand. Place a piece of wax paper (the same size as the plastic wrap) on top of the flattened dough. (see video)
-
Using a rolling pin on top of the waxed paper, roll out to desired thickness. I roll mine about 1/4 inch thick.
-
Lift rolled out dough from bottom plastic wrap and place on a baking sheet. Place in the refrigerator for 1 hour or in the freezer for 15-20 minutes.
-
Repeat with reserved half of dough.
-
When ready to bake, heat oven to 375 degrees and line two baking sheets with parchment paper.
-
Remove dough from refrigerator/freezer and cut out using desired shapes, trying to place similarly sized shapes on the same baking sheet. Place cut out shapes on prepared baking sheets and place in the refrigerator for 5 minutes.
-
Bake for 7-10 minutes (depending on the size of your cookies and how dark your pan is). Dark gray or black pans will cook the cookies faster.
-
Once baked, allow to cool for 5 minutes before transferring to a cooling rack, Cool completely prior to decorating or storing.
-
Re-roll scraps to make more cookies using the same technique as above.
Royal Icing (from sweetsugarbelle.com)
-
Stir the flavoring into half the water
-
Using a mixer on low speed, mix the sugar and meringue powder
-
Slowly add the water/flavoring mix to the dry ingredients. The icing will start to become thick and lumpy.
-
Continue adding the water until icing reaches a thick, honey-like consistency. Then, turn the mixer to medium speed and mix for 2-4 minutes until icing is thick and fluffy. Watch carefully and stop mixing once icing forms a soft peak. See Notes for tips on icing consistency.
This makes about 5 cups royal icing. You can cut the recipe in half if needed.
To outline cookies, a firmer icing is needed. You may need to add a teaspoon or two of water at a time to reach the right consistency. It should be a bit softer than toothpaste, but not runny. I use a disposable piping bag and a #1 or #2 icing tip for outlining or piping details. Once cookies are outlined, allow to dry for about 30 minutes before flooding them. Flooding consistency should be honey-like. First. reserve some thick icing for piping details later on. Then, add water one teaspoon at a time and mix with spatula until honey-like consistency is reached. I place my flood icing into a squeeze bottle, but you can use a piping bag. Use a toothpick to help icing reach entire cookie or very small areas. Once flooded, the cookies will need to dry for a couple of hours prior to adding details. Use reserved thick icing for details.
I love your story… one year our new cat tore open almost every gift we had (now gifts only come out of locked bedrooms on christmas morning! I can’t wait to try your cookies since they look like they keep their shape. Where did you get the tree cutter? It’s gorgeous!
Hi Sarah! Thanks for sharing your funny cat story. I can relate to that one too! We have two cats and have to keep a close eye on them around the gifts. I bought that pretty Christmas tree cookie cutter while on a trip to Switzerland. I’ve never seen one like that in the U.S. But, I did a little looking online for you and I found it! 🙂 It looks like it’s around $6. It’s beautiful, but a little tricky to get the cookie dough out of the thin branches. Here it is: https://bakeria.ch/fir-tree-with-star-cookie-cutter-11cm-p-7874.html
Merry Christmas!
Hi! Can something be substituted for the coffee or would still taste good if I left it out? I hate the taste of coffee so much. Thank you! 😊
Hi Elizabeth. Sorry for the delay in my reply. You can leave the coffee out and they would still taste almost the same. They actually don’t taste at all of coffee. The coffee just adds depth to the cookie’s flavor. But, either way, you can leave it out 🙂
How long will the cookie dough last in fridge? I made a bunch but would like to wait to finish.
Hi April. It should last 3 to 5 days in the fridge or up to 3 months in the freezer. Happy Baking 🙂